 Did the picture peak your curiosity?
Did the picture make you want to investigate more?
Would you have read a long essay post without the picture?
These are important questions to ask yourself as you start an online business.
Welcome to the Tuesday Tutorial! Each week we aim to share something with our readers that will help them improve their chances of making money with an online business.
Five years ago, if a company didn’t have a website, they were leaving a lot of money on the table. Now, if a company doesn’t have a blog in conjunction with their website, they are missing a big segment of their market share.
Why is blogging important? Not only does a blog encourage client interaction, but it also shows that a business is aware of their clients needs. Blogs are also an integral part of search engine optimization and brand management.
One important part of blog success is images. Images “spice up” an article, they add variety, and help capture the attention of blog readers. Think about it, if a magazine didn’t have pictures in conjunction with it’s articles, would anyone EVER read the magazine?
Here’s a tutorial on how to add images to your wordpress blog:
Step 1: Login to your wordpress account
www.yourdomainname.com/wp-admin. On the first page (known as the Dashboard) you’ll see this image:

If you are writing a Blog Post, click on “Write a New Post”. Pages are fine to create too but for now let’s focus on one thing at a time :).
Step 2: Locate the Add Media Icon below the Title section
If you put your cursor on the small box, the phrase “Add an Image” will appear. Click on that small box.
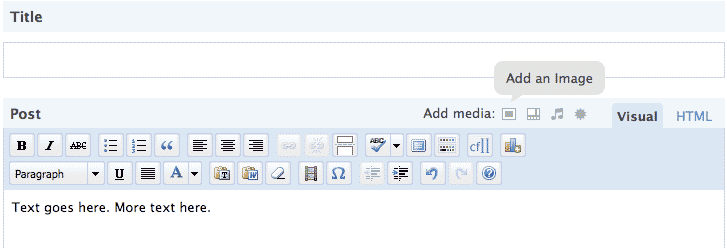
Step 3: Upload pictures from your computer.
This step can be a bit tricky depending on what brower (Internet Explorer, Firefox, etc.) you are using and depending on your computer. Here’s what the screen will look like:
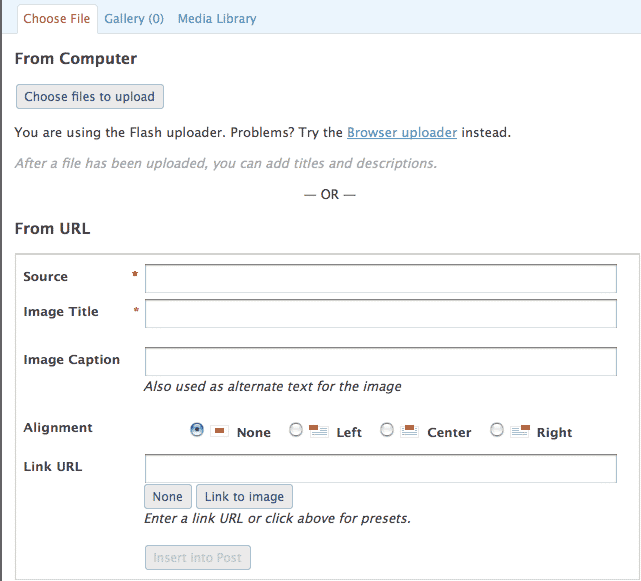
If you are using a Mac, clicking on the “Choose files to upload” will work fine (proceed to Step 5).
If you click on the “Choose files to upload” icon but nothing happens, see Step 4.
Step 4: Click on the “Browser uploader” link
Here’s a screen shot of that section – found right below “Choose files to upload”:
![]()
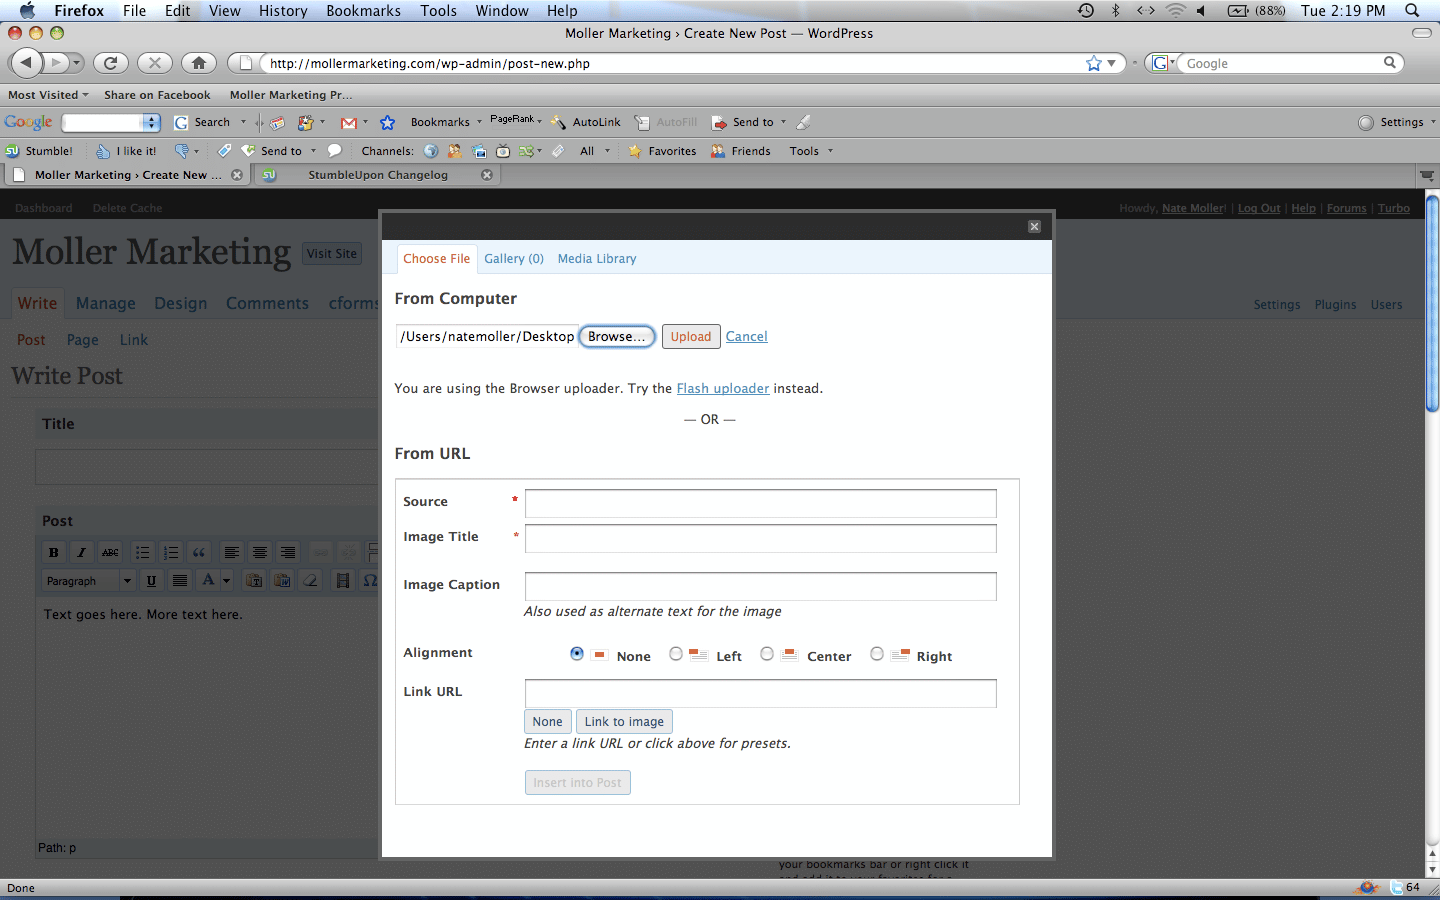
After clicking on “Browser uploader” the top portion of the screen will change and look like this:

Click on Browse, find the picture(s) you want to upload, and click Upload.
(Unfortunately, I think you can only upload one picture at a time this way. If the prior step works, I know you can select multiple pictures at a time by holding down CTRL while selecting the pictures.)

Here’s a big picture of what the page will look like:
Step 5: Make necessary adjustments
After uploading your first picture, the screen will look like this.
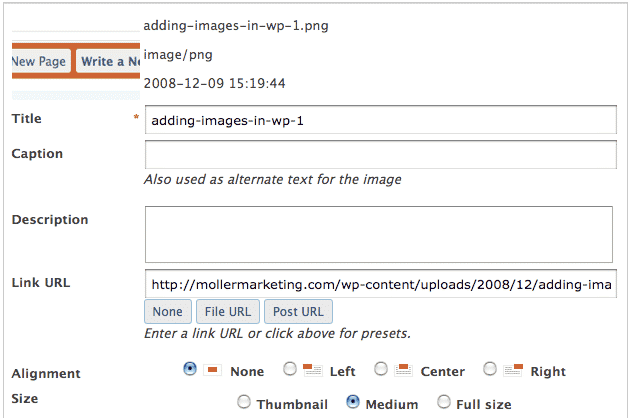
There are a few adjustments I recommend making:
- Give your pictures a name. If you haven’t already named the image with a keyword phrase, adjust it here in the Title Box. Giving your images a keyword phrase title will help search engines “see” the picture. Here’s an example:

- Click NONE on the Link URL. This is just a personal preference: I don’t want people clicking on the image and it taking them to a new screen of just the image.

- Select the Full Size button. At the bottom of this picture you’ll see Size with buttons for Thumbnail, Medium, or Full Size. Again, a personal preference but I recommend the Full Size. If it is HUGE, you’ll need to make adjustments again 🙂

Step 6: Insert the Picture into your Blog Post
Click this button at the bottom of the screen and you’re done (sort of)
![]()
Coming soon – How to Align Images Correctly in WordPress
Stay Tune!
Was this Tuesday Tutorial helpful?