Categories
Digital Presence & Marketing Strategy

Tuesday Tutorial: How to Set Up Google Alerts and Why?

google-alerts-spyWhat’s a Google Alert?

How can Google Alerts help me as I’m starting an online business?

Here’s an answer straight from the source:

Google Alerts are email updates of the latest relevant Google results (web, news, etc.) based on your choice of query or topic.

Some handy uses of Google Alerts include:

  • monitoring a developing news story
  • keeping current on a competitor or industry
  • getting the latest on a celebrity or event
  • keeping tabs on your favorite sports teams

I’ve talked to clients a lot lately about duplicate content when writing articles and submitting them to article directories. One of the things I’ve learned is that, as long as you “get credit” for the content you write first, you can then re-publish that content in multiple sources online to help you build links and share your message.

How do I know when I ‘get credit’ for an article or content I put on my blog?

This is a question I hear again and again; it’s a valid one. For this reason, today in our Tuesday Tutorial, we’ll discuss how to set up Google Alerts for your online business.

How to Set Up Google Alerts for Your Online Business

Step 1: Go to Google.com 🙂

You’ll see this page (I would hope most of you have seen this page before):

google-alerts

At the top right corner of the screen, if you don’t have a Google Account or you aren’t logged in, Click Sign In.

Step 2: Login to your Google Account or Click Create an Account Now
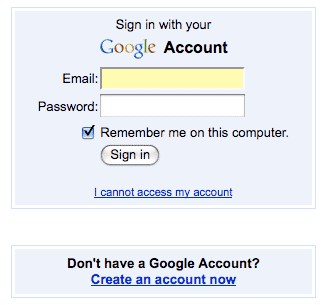
google-alerts-1

Having a Google Account is a MUST!  If you haven’t noticed already as you start an online business, Google is the “Mother Ship”.  You name it, Google has a hand in it.

Some of the best things about having a Google account include:

If you have to create an account, you’ll see this picture:
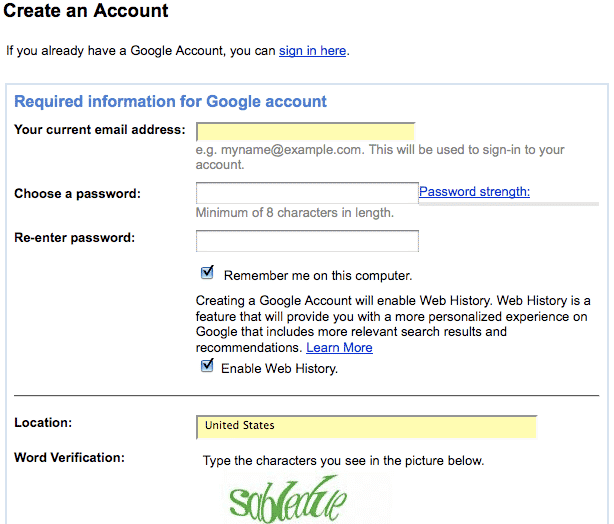
google-alerts-2

After filling out this information, or once you’ve logged in to your Google Account, go to the top left corner of the screen.

Click on more and a drop down menu will appear.  Select “even more” at the bottom of the drop down menu.
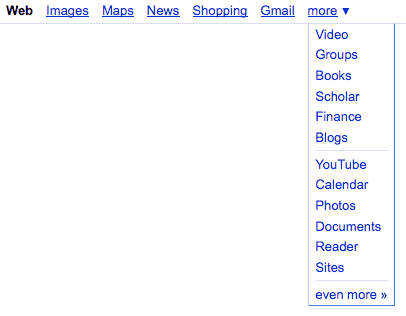
google-alerts-4

Step 3: Go to Google Alerts

You’ll now see this page. Select Alerts:
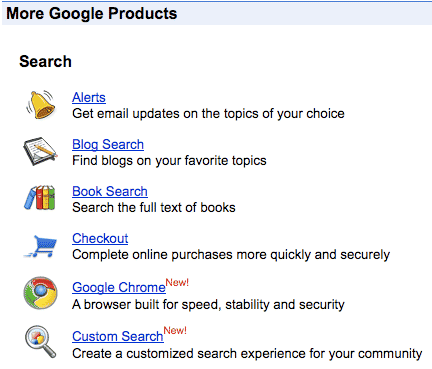
google-alerts-5

Step 4: Select Keyword Phrases as Alerts!

This box will be on the right hand side of the screen.
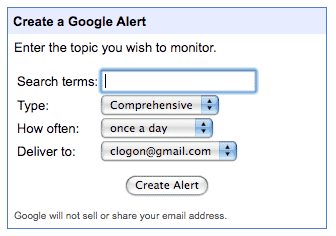
google-alerts-6

Keyword Research will come in handy once again.  In the Search terms box, type in one of your most important keyword phrases that you want to be ranked for at the top of Google.  I suggest you use quotation marks ”  ”  – this will limit all the combination of words that you’ll be sent otherwise.

Here’s an example – notice I typed in “making money online“:
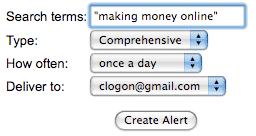
google-alerts-7

You’ll also see:

  • Type: Keep Type on the Comprehensive setting for now.
  • How Often:  This is important: we talked earlier about “getting credit” for your content with Google.  Select “As it happens” from the How Often drop-down menu.  This way you will be notified by Google as soon as they find your new article (which will include good keyword repetition of the phrases you want to be found for, including the keyword phrase we’re setting as a Google Alert).
  • google-alerts-8

  • Deliver to:  I suggest you have the Deliver to option set to your Google email address.
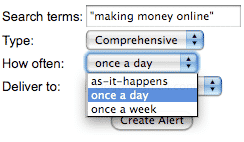
Once you’ve selected the different options, click Create Alert.  You’ll see this:

google-alerts-10

google-alerts-9

Step 5: Prepare for email alerts!

Email alerts will start coming to your gmail inbox almost immediately, especially if you are targeting competitive phrases.  The emails will look like this:

google-alerts-12

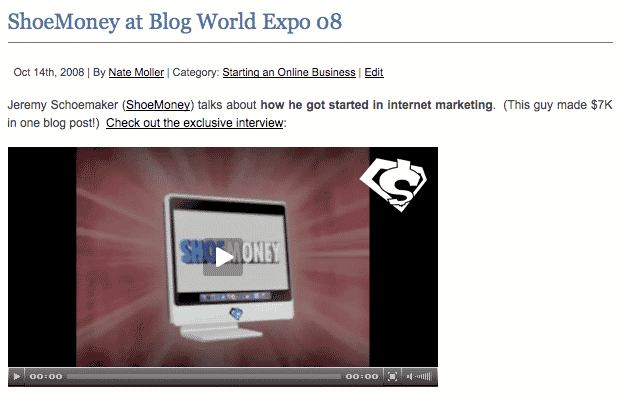
The best part is, when I click on the link in the email, I can see where the phrase “moller marketing” was found.  In this case, the link takes me right to my own blog post about my interview with ShoeMoney:

google-alerts-13

Not only can I watch for my own links, but I can track my competitors by seeing what type of content and keywords they are targeting.  Google Alerts helps us take “keyword research” and “competitive analysis” to a whole new level!

How has Google Alerts helped you as you are starting your online business?
Google spy image by somethingcreativeinc.com
Categories
Digital Presence & Marketing Strategy

Tuesday Tutorial: How to Create a Facebook Page and Why

facebook-pageFacebook, What’s that?

Isn’t Facebook just for kids?

If you don’t admit that you too have asked these questions, you’re probably lying! The great news is that Facebook is an excellent way to connect with your target audience; it’s way beyond a “just for kids” atmosphere too.

Facebook has been a great tool that I use all the time for networking and building business relationships online.  Not only is it easy to find people interested in the same things I am, but it’s also easy to form groups, pages and other applications that really help promote what I’m trying to accomplish on and offline.

What’s a Facebook Page?

Today’s Tuesday Tutorial is about setting up a Facebook Page for your online business.  First off, here’s what a Facebook page is:

Facebook Pages is a Facebook Product, built by Facebook engineers. Facebook Pages, which launched in November 2007, allow local businesses, sports teams, artists, films, brands, public figures, non-profits and other business organizations to have a presence on Facebook. Today, hundreds of thousands of businesses are leveraging Facebook Pages to reach consumers.
Through Facebook Pages we hope businesses have a more powerful tool to build a consumer base, sell products, run promotions, schedule appointments or reservations, share information, and interact with customers.

Users can add themselves to your Facebook Page as fans, write on your Wall, purchase products, learn about special promotions, upload photos, and join other users in discussion groups. You can send Updates to all your fans whenever you like. And you can add applications to your Page and engage Facebook users with videos, notes, links, Flash content, and more.

There are three reasons this can be awesome for your online marketing campaign:

  1. Yet another way to connect with your target audience: I look at Facebook this way – millions upon millions of people are using Facebook.  They are sharing their interests, where they’re from, their birthdays, pictures, even their favorite songs (all this is protected – you have to “approve” to let others see your information by accepting them as friends).  So, if I can connect with the right people and be in front of them almost every day when they come to their Facebook page, why NOT?
  2. FREE, FREE, FREE: I can’t say it any clearer than that.  Currently Facebook and most of its services are FREE.  There have been rumors floating around that they are going to start charging but I highly doubt that – they’ll lose tons of traffic and usage.  So, TAKE ADVANTAGE of the FREE Marketing while it’s available!
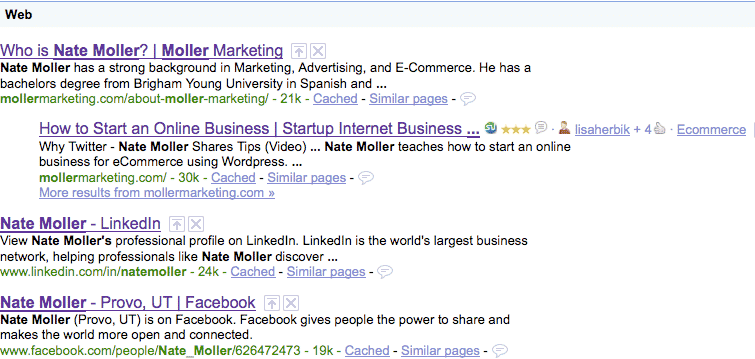
  3. Brand & Reputation Management: In the online marketing industry, this topic makes marketing consultants a lot of money.  Helping small, medium, and large sized businesses protect their brand and reputation is a huge endeavor.  Not only does it help clients maintain a positive perception to potential clients, but it also helps them land huge contracts that they would have never signed if, when a prospect Googled their business name, they found tons of negative press.  Facebook is one more way even start-up businesses can protect their name and reputation – it’s never too early to start!  Example: If I Google Nate Moller – notice where my Facebook account is:facebook-branding1

Now that you have a better understanding of WHY FACEBOOK PAGES, let’s talk about How to Set Up a Facebook Page.

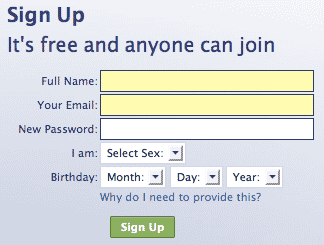
Step 1: Login to Facebook!

(If you haven’t even set up a Facebook account, you can probably stop reading right now and go set one up at www.Facebook.com)

facebook-page-1

Step 2: Go to this web address: http://www.facebook.com/pages/create.php

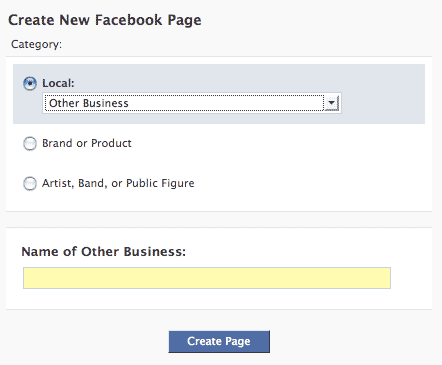
You’ll see this page:
facebook-page-2
It’s important for you to determine which category you plan to focus on.  I don’t think there is a right or wrong answer, but I lean toward the Brand or Product category.
Here’s the category I selected for MollerMarketing.com:
facebook-page-3

Step 3: Enter your Business Name (branding purposes):

facebook-page-4
Then click this button:
facebook-page-5

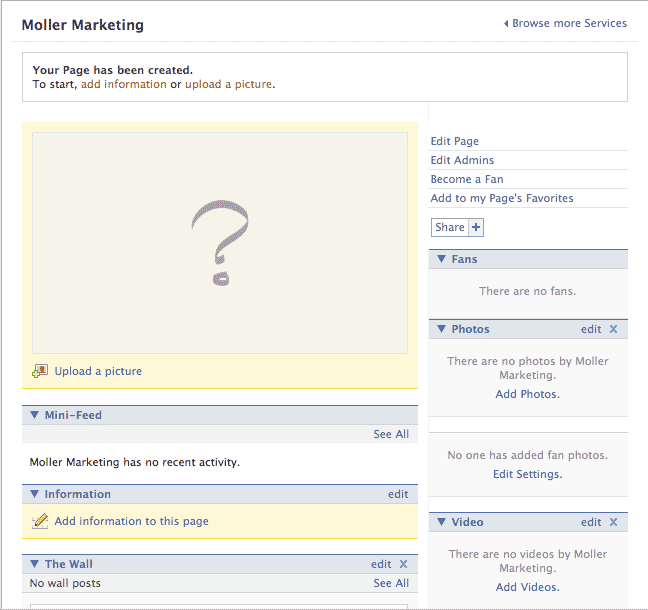
Step 4: Congratulations, you now have a Branded Facebook Page:

facebook-page-6

A few cool SEO things:

  • The domain name has “Moller Marketing” in it which is great for brand management and search engine friendliness.

facebook-page-7

facebook-page-8

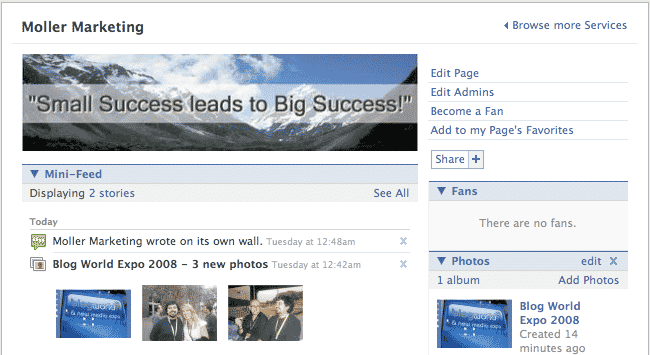
After a few tweaks, here’s what your Facebook Page can look like:

facebook-page-final

Now go and do likewise! Join my Moller Marketing Page too!